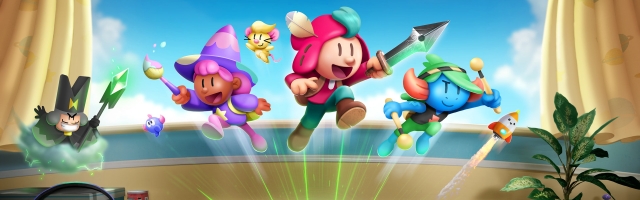
The Plucky Squire All Glitchbird Locations Guide
In The Plucky Squire, the rarest collectible in the game is none other than the ever-elusive Glitchbirds! There are a total of 10 in the game (as you can see in the achievement), and to acquire them all, you'll need to keep a keen eye and, quite often, return to complete puzzles once you've unlocked the given Chapter's gimmick. In this article, we're going to be detailing how to find all of the Glitchbirds!
Before we start, however, I do want to give a quick warning about the way Glitchbirds work in The Plucky Squire. The way the achievement is coded means that you need to acquire all of the Glitchbirds in a single playthrough, lest you restart the entire game to get them again. Though the existence of Chapter Replay eases this when talking about the Art Scrolls, Glitchbirds reset every time you get a new one in a Chapter Replay. So, even if you have 9/10 and go back to the one you missed, it'll set your achievement at 1/10. The game doesn't seem to track Glitchbirds individually as an item (the way Art Scrolls work), so this will easily become the most tedious achievement of the bunch.
Now, without further ado, we may begin with the first Glitchbird!
Glitchbird #1
Chapter One — Some Serious Beeswax

In the first Chapter, right after the page where you meet Martina, you will be overlooking the Tome Tower. From here, you can find the first Glitchbird, which will be standing right there behind the sign! Break the grass and collect them by coming into contact with their character model.
Glitchbird #2
Chapter Two — Tome Tower

The second Glitchbird can be found in the second Chapter. After the world has gone dark and green lightning starts striking, you'll eventually fight a few monsters spawned from the very same green thunder. When you fight your first big slime monster (the one that spawns with three others), you'll be in an open field with a large rock in the middle of a round-like arena and ruins around you.
The Glitchbird is located behind the ruins on the top right. You can tell as it will be sparkling, and you can peek behind; the wall will go invisible, revealing the second Glitchbird. Be very wary with this one, as there is a slope right in front of where the Glitchbird is present — jumping down will lock it away, and you'll have to restart from the nearest checkpoint, as there isn't any way to backtrack at this point of the game.
Glitchbird #3
Chapter Three — Moonbeard

The third Glitchbird is in the training section with Moonbeard, where he's teaching you how to use the gloves to sift through pages. When he says that he is thirsty and wants you to get him a drink, you'll need to go back two pages in The Plucky Squire book, where you'll return to where the game started. Here, instead of going to Moonbeard's home, you should head over to your own (the one on the far left of the world). Inside, you'll find the third Glitchbird.
Glitchbird #4
Chapter Four — A Treacherous Trail

This fourth Glitchbird gave me a headache and a half to acquire. First, I'd recommend heavily, at this point, to enable "Show Hidden Portals" in the accessibility section, as this one will be hidden through that (though you can find the page on your own, it'll be less confusing if you enable this setting).
To find the Glitchbird, you'll need to do the most terrifying thing you can do in The Plucky Squire — advance past the point where the bugs are pestering the molluscs. After fighting in the tree and advancing to the mollusc city, you'll need to take the Metamagic portal and teleport out of the questline to go back to the inside of the tree (where you fought the boss).
The first half of these two pages will be fully blacked out if you haven't enabled the accessibility settings I recommended earlier. To find the Glitchbird, you'll have to go into the pitch-black page through a Metamagic portal at the centre, which will light it up and reveal the Glitchbird sitting there.
If you advance past the word puzzle in the mollusc city, you will lock yourself out of this Glitchbird and be forced to use a previous save to come back here (if you haven't advanced much in Chapter Fivethat is).
Glitchbird #5
Chapter Five — Artia!

Alright, you've arrived at Artia and halfway into your Glitchbird hunt... and then there's that one Glitchbird taking a vacation that'll make you want to rip your hair out, thinking it's a puzzle. No, trust me — it isn't! Instead, after you've finally finished everything in Artia's Plaza and go to Artia Castle, you'll need to head to the far right, where the Glitchbird is standing in the corner. Pvt. Canary won't let you through, but if you go between the paintbrush gates and to the left past the massive blue sharpener, you'll be able to find a hidden door behind a pillar obscuring the entrance.
Glitchbird #6
Chapter Six — Very Metal

This Glitchbird appears way into Chapter Six — Very Metal, so feel free to advance all the way up past the fight of the Mega Eagle. After that, you'll be asked to return to Moonbeard to create a concoction that'll be able to destroy Ironweed, but keen adventurers will have seen some Ironweed earlier in the Chapter. Go out with your concoction into the real world and go turn the pages back ten times to return to the Cheese word puzzle. From here, go back one screen, and you'll find the Iron Weed, and behind it, the sixth Glitchbird!
Glitchbird #7
Chapter Seven — Beach Battle Boogie
The Glitchbird in Chapter Seven — Beach Battle Boogie is very freely shown to the player, making it one of the easier ones to get. Still, it's worth a mention on how to actually get it, as nervous readers might be afraid to leave it behind and be forced to replay the entire game (that's likely where I'd be if I was the reader, not the writer!).
In order to free the Glitchbird and get it, you'll need to advance until you unlock the special ability in Chapter Seven — Beach Battle Boogie: the Bomb Stamp! This item lets you destroy metal objects, and it'll be the key to destroying the one blocking the path to the Glitchbird.
Glitchbird #8
Chapter Eight — Clash at the Castle

The eighth Glitchbird is easy to acquire if you don't get ahead of yourself. After Violet defeats the Mage and you stand at the entrance of Artia Castle, go to the far left of this page, where you'll find the Glitchbird sitting by the left-most tree.
Glitchbird #9
Chapter Nine — The Magnificent Humgrump
The Glitchbird in Chapter Nine — The Magnificent Humgrump isn't too difficult to stumble across. After jumping down the treacherous vents and escaping the warm and bright laser, go to where the treacherous Pip pulled the lever and continue far left, where you'll find a small light and a hidden corridor containing the ninth Glitchbird.
Glitchbird #10
Chapter Nine — The Magnificent Humgrump
When our band of miscreants arrives at the Monumentally Majestic Palace of Humgrump to foil our protagonist's plans, you'll be able to find the final Glitchbird. Hidden behind one of the machines on the far right of the first page inside of the castle will be the last to complete your collection.
And there you have it! You'll have completed all of the Glitchbirds! It's a rather lengthy journey, and truthfully, rather painful in parts where you might miss one. Thankfully, for the most part, if you haven't finished a chapter, you can return to grab most of the Glitchbirds. It's still the most arduous grind of collectibles beyond the Art Scrolls, but at least there were only 10 Glitchbirds in relatively easy-to-find areas...
...except the fourth one. That bugger made me replay the whole damned game for the achievement.


COMMENTS